Quite a few of my friends seem to be getting married this year, or early next, and alot have asked me where I got my stationary made… Well the simple answer is that I made it myself! I can’t say that it was a ‘simple’ process, it was blooming hard work, and took alot of planning and patience on my part (which anyone who knows me, knows patience isn’t one of my best qualities!). But after spending a couple of weeks looking at different designs online, and then contacting local companies to see what their “going rate” was for what I had in mind, I realised that this is just another thing in the ‘Wedding Business’ where companies can just outright rip you off…
So I made the decision to design and make everything myself. I initially spent some time narrowing down my list of “likes” from all of the research that I had done, and then drew out a simple design of ivory linen card (colour to match my dress), with red and gold ribbon (matching the wedding theme colours).
My first point of call was to get the crafts needed to make my stationary… I started out by going to placing like Hobby Craft and looking at the different sizes, shades and quality of card, ribbon and embellishments. Once I’d done this, I wrote down everything I liked, and started to hunt around online for better prices (I wasn’t going to pay their store prices!). I ended up finding some ‘shops’ on Ebay who sold what I wanted, and I contacted each directly with my ‘order’ for each set of items I wanted… I then haggled a bit with each one and came up with ‘package deals’ which all included delivery as below:
1. Ebay Shop1:
- 70X A4 Sheets Ivory Linen Card 260GSM (pre-scorded)
- 130X Ivory Paper Inserts for A6 Cards 120GSM
- 130X A6 Ivory Linen Cards
- 130X A6 Ivory Envelopes
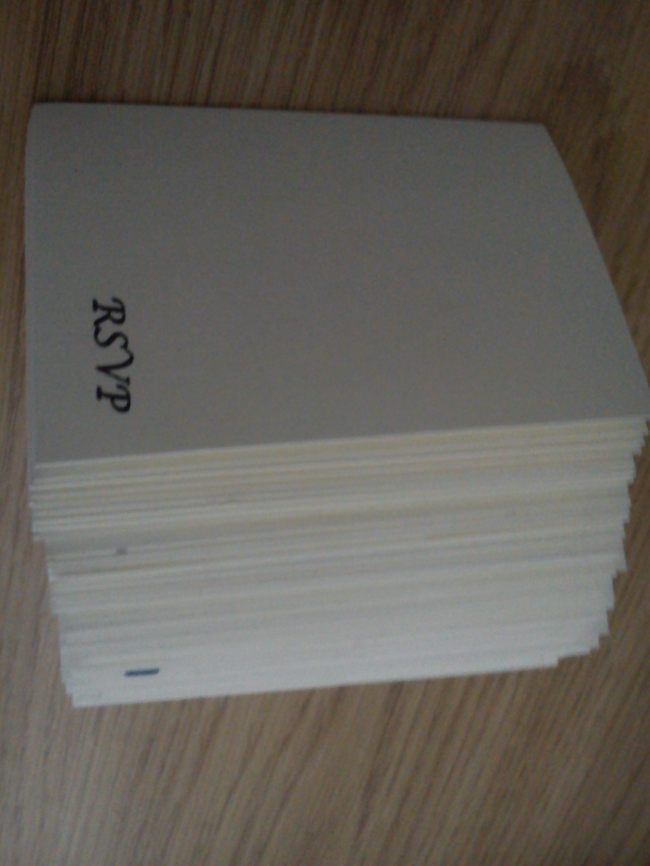
- 130X A7 Ivory Linen Cards (RSVP)
- 130X A7 Ivory Envelopes (RSVP)
- 100X Ivory Linen Place Cards 260GSM
- 400X 4mm Round Ivory Glossy Pearl Acrylic Flatback Gems
- TOTAL PRICE: £50 inc. next day courier service
2. Ebay Shop2:
- 25M Berisfords 10MM Honey Gold Sheer Organza Ribbon
- 3M Berisfords 15MM Ivory Wired Sheer Organza Ribbon
- 2M Berisfords 50MM Red Double Satin Ribbon
- TOTAL PRICE: £30 inc. next day courier service
3. Ebay Shop3:
- 5X Sheets Heavy Duty Ivory Embossed Luxury Wrapping Paper – £8.50 inc. delivery
4. Ebay Shop4:
- 5X Double-Sided Crafting Tape (roller)
- 2X Precision Super Glue
- 2X PVA Glue
- TOTAL PRICE: £15 inc. delivery
5. Ebay Shop5:
- 3X Black Ink Cartridges – £20
TOTAL COST: £123.50
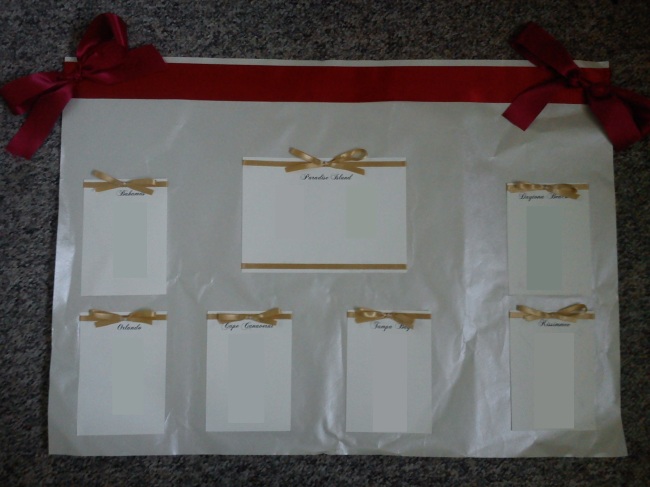
This made up 130 Day & Evening Invites each with inserts and envelopes, RSVPs & RSVP envelopes, 90 Service/Menu Cards, 90 Table Place Name Cards, 7 Individual Table Name Cards, 1 Large Room Table Plan & 1 Large Decorated Post Box. Still with lots of left over card and ribbon afterwards!
I’d found a downloadable font on one of those free font websites that I liked, and using MS Publisher, I designed the outside and insides of all of the envelopes, and printed them all up… This was quite a stressful process as we found that the linen card was slightly too heavy for our printer, and so wasted quite a few sheets on getting the technique right for printing… This ended up being a single sheet at a time job, which was really time consuming to say the least!!
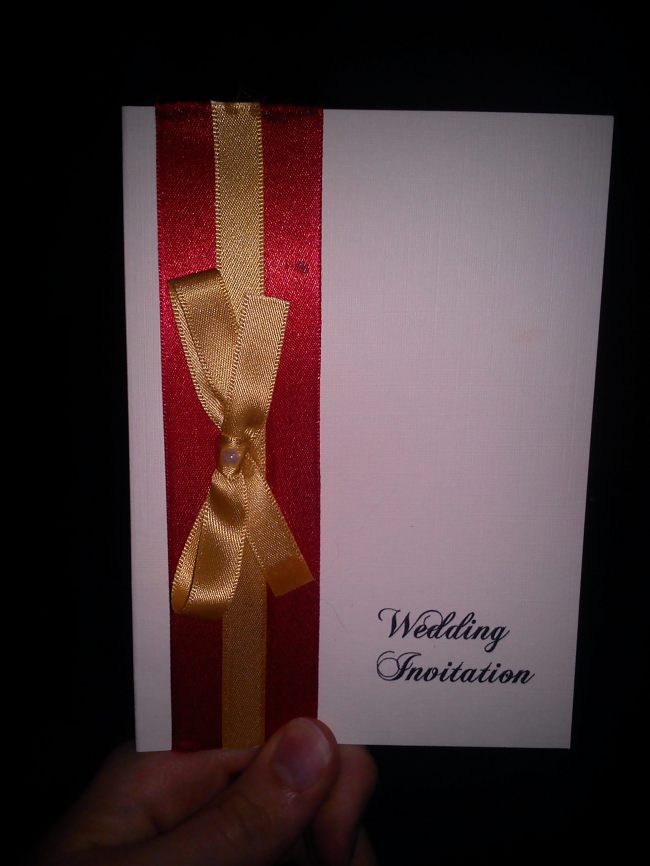
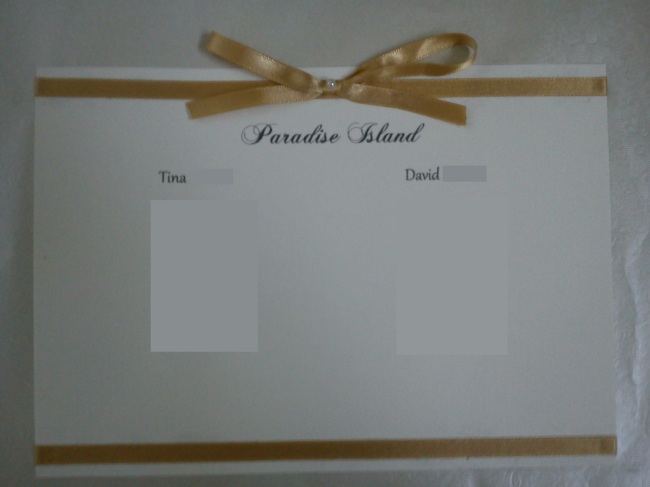
Once these were all done and sat drying, I started cutting up the ribbon to be the correct length – This was three different pieces for each card, the wide red for the base, a thin line of gold to go over the top, and another thin piece for creating the bows. Once these were all equally cut, I sat and made all of the bows, which was alot harder than it looked to get them to look even – not as easy as tying your shoelaces! Once these were also done, I glued the pearls onto the tops of the bows (and stuck my fingers to lot of them in the process!), and put these aside with the rest of the ribbon for the cards to finish drying… Finally when everything was dry, using the tape I ran two parallel lines along the left side of the cards, and placed the red ribbon flat on top, folding the edges over the top of the card by about 2cm to give it a clean edge. After, I did the same with the thin gold ribbon (the double-sided tape was just thin enough to be hidden under the ribbon) I placed the bow ontop, and glued it down with superglue… This caused a few ‘accidents’ where the bow would move at the last second and cause a drip of glue to get onto the red ribbon… In fact the final picture below does show this, as it was one of my ‘trial runs’ which I kept for reference…
Once this was all complete and dry, I layered the inserts inside the cards to just cover over the edges of the ribbon I had brought over from the front. These were stuck down with the tape and a little PVA glue in the corners. And this gave me my finished cards!
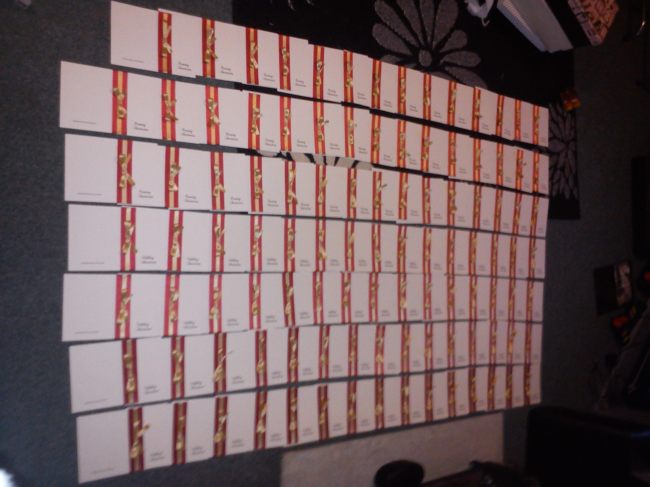
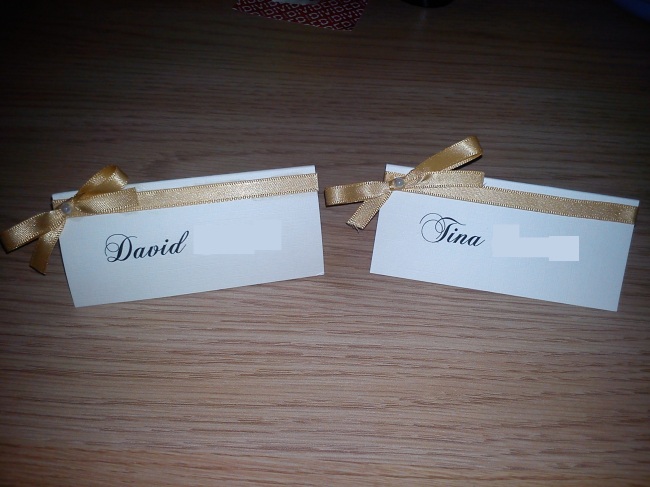
I followed the same process with all of my other stationary, printing the cards first, then cutting and tying/sticking down the ribbons accordingly, and sticking them on… For our table name cards we chose to use places we were going to be visiting on our Honeymoon; we traveled to Florida and the Bahamas.
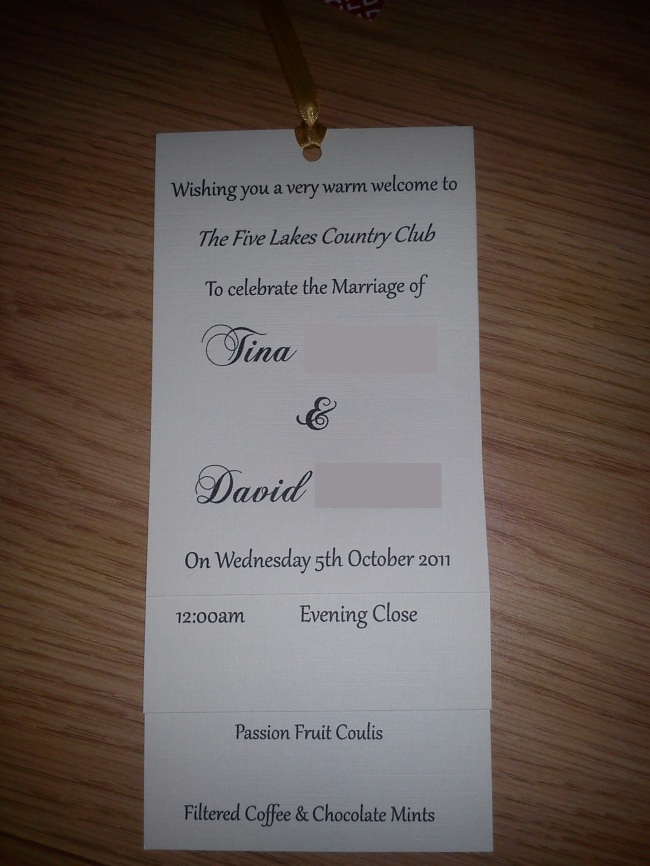
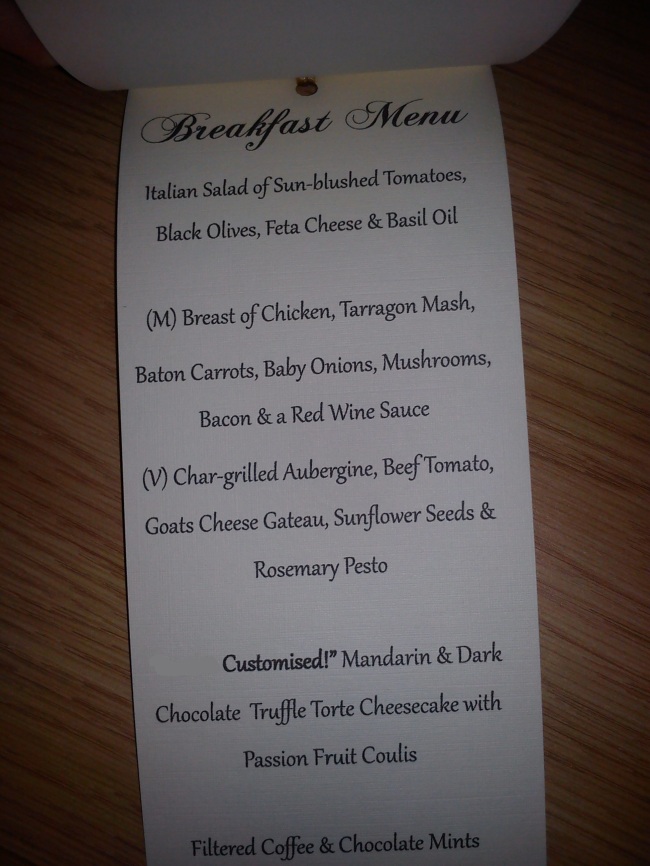
My Ceremony Cards were a 3-piece set, which included a welcome front, the ceremony details and the breakfast menu. I started by printing the three sets of information onto the A4 card I had purchased, and then using a guillotine I cut the sheet into three pieces, each slightly shorter than the other so that they laid ontop of each other with an ‘over-lapping’ effect. I finished by punching a hole in the top, and looping through some gold ribbon to hold them together.
I did the same with the gift registry cards, as I built my own website asking for things towards our honeymoon (I’ll do another blog entry on this!) and so just printed some little business-card-sized cards with the website address on the back to put inside our envelopes…
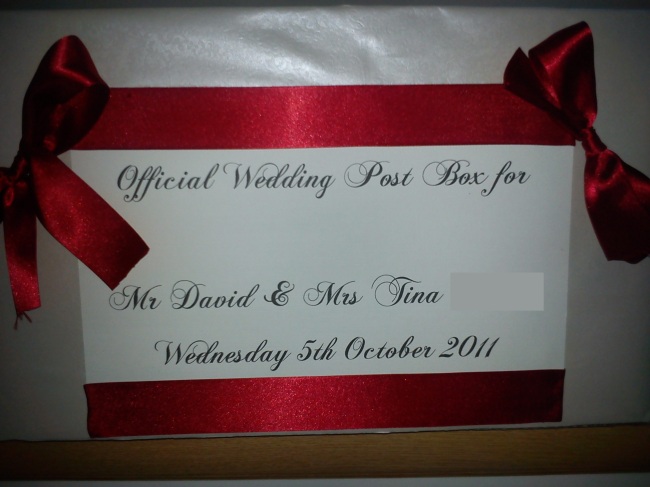
Finally, my wedding post box… For this I used an old office box, the kind you get when you order 6-8packs of A4 paper from the stationary shop… And then using my Ivory Wrapping Paper, I covered both inside and outside of the box and lid separately. I then cut a hole along the top, big enough to put envelopes inside, and covered the box in ribbons and a printed sign, sealing the box by putting ribbons through the lid and handles.
After I had finished, for a laugh I took one of my finished cards (card, envelope, RSVP & envelope, gift registry card) and the ceremony cards into a local stationary making business who advised me that for them to create just the invites and ceremony cards in the same way, would cost me approximately £650… Mine cost me £123.50 and included everything else such as the post box, table place & name cards, table plan etc.
Sorry for the quality of the images attached, I pulled all of this out of storage to take the snapshots, and consequently some of the bits have got damaged from being folded etc. to store. The finished card was also one of my “failed” attempts as I dripped a bit of glue onto the red ribbon, and also hadn’t folded over the edges enough on the top/bottom of the ribbon… Unfortunately the better versions are packed away in a different box, and not easily reachable at this moment to get a picture! 😦

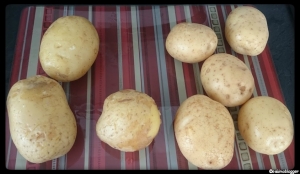
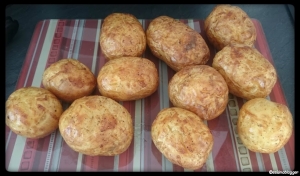
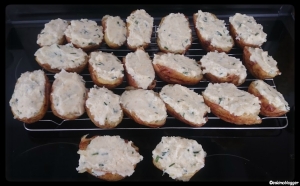
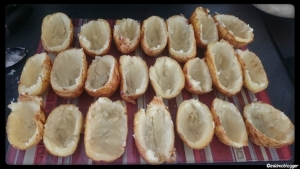 spoon, scoop out the center of the potato leaving a
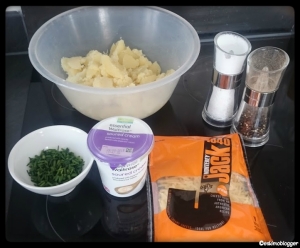 up until it is nicely blended. You could use a blender for this, but I personally prefer the crunchy texture you get by doing it by hand… You don’t need it to be smooth in consistency – just well mixed so that all of the potato is coated in the cream & cheese mixture